Check this first.
Do you have coverage? Visit freedompop.com/coverage, and make sure you will receive a signal in your area. Enter your full address for the most accurate results.
Is your account in Active status? Check your account for any billing suspension messages or errors. If you have a failed charge on your account, your account will be suspended until the failed charge goes through. Click here to log into your account and resolve any status issues.
Troubleshooting your Android phone
We can help resolve technical issues. Complete the following steps, don’t skip! Allow yourself 20 minutes or so to go through each step. Do you have an iPhone? Click here.
First
Did you activate your SIM card online at freedompop.com/activate? If you have started a phone number transfer, your device won’t work until that transfer is finalized.
Remember to cancel your old account after the transfer is complete.
Next
Insert your SIM card into a compatible phone. Our SIMs work with GSM unlocked phones and phones compatible with the AT&T network.
Then
Have you removed all old FreedomPop applications? The FreedomPop Messing and the FreedomPop Free Talk and Text applications are not needed for Premium SIM cards. In fact, having this application on your phone can cause problems with calling or texting.
Before you delete the app, save any calling, text message or voicemail records you want to keep.
To remove the application open your phone's Settings app. Then tap on Apps or Applications. Search for the "FreedomPop Messaging application" and/or the "FreedomPop Free Talk and Text" application.
Tap the older FreedomPop applications and then tap on "UNINSTALL".
Finally
You’ll receive a text message when your phone is registered and connected to the SIM card. You may receive an internet connection automatically, but if not, configure APN network (internet) settings manually.
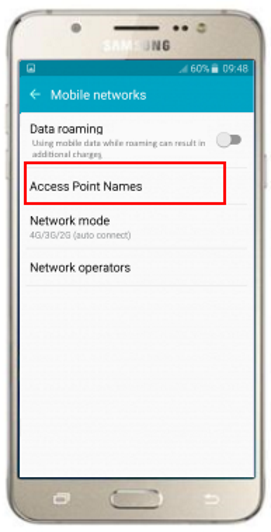
Step 1: Open your Settings app and tap on Mobile Networks. Different phones have a different path. Some phones may require tapping "More" first, or "Connections".
If your phone doesn't match what you see here, do a Google search for your device name and the phrase "APN steps" for help finding your phone’s APN settings. For example, if you have a Pixel phone, search the phrase "Pixel APN steps".

Step 2: Tap on the Access Point Names option. This is how your FreedomPop phone will connect to the mobile network.
If you cannot tap on Access Point Names, this probably means your device is locked to a specific carrier. Remember, only unlocked phones work with our SIM cards.
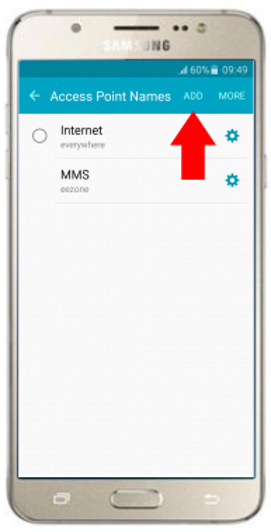
Step 3: Tap the "+" symbol to add a custom APN. On some phones you may see ADD instead of a "+" symbol.
Again, if you cannot add a new custom APN, your phone is probably locked to a carrier. Click here to learn more.
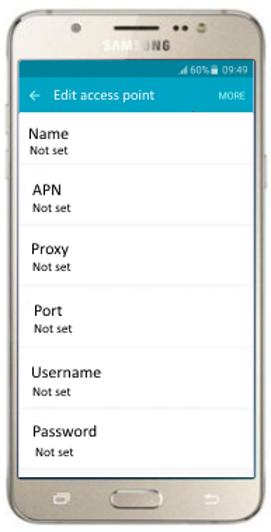
Step 4: Enter the following details in the appropriate field:
APN: Ereseller
Proxy: Not set
Port: Not set
Username: Not set
Password: Not set
Server: Not set
MMSC: http://mmsc.mobile.att.net
MMS proxy: proxy.mobile.att.net
MMS port: 80
MCC: 310
MNC: 410
Authentication Type: None
APN type: default,mms,supl
APN protocol IPv4
Bearer: Unspecified
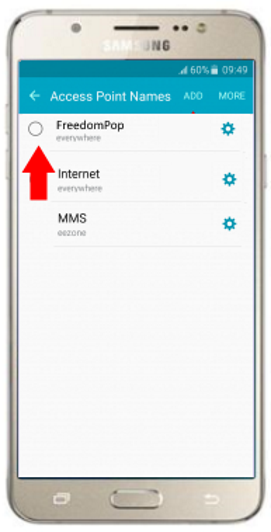
Step 5: Tap on Save and then go back to the previous menu. Tap on the newly added FreedomPop APN, to select it.
Step 6: Wait about 10 minutes for all of the changes you’ve just made to go through.
You can now use your phone to receive an internet connection.
We can help resolve technical issues. Complete the following steps, don’t skip! Allow yourself 20 minutes or so to go through each step. Do you have an iPhone? Click here.
First, check coverage
Visit https://ott.freedompop.com/coverage, and make sure you will receive a signal in your area. Enter your full address for the most accurate results.
Next, check your account
Check your account for any billing suspension messages or errors. If you have a failed charge on your account, your account will be suspended until the failed charge goes through. Click here to learn more about suspended accounts.
If you've disabled Top Ups and reached your data limit, your account will become suspended. In this case, you would not be able to use your device.
Any month that your usage is within 100MB of your monthly plan broadband capacity limit, or your account balance falls below $2 credit, your account will be charged using the primary payment method on your account. If you turn this Top-Up feature off, your account will be suspended instead of charged.
Click here to learn more about reaching your data limit.
Download the FreedomPop application
The FreedomPop Messaging application is required for calling and texting to work. This application is compatible with phones running operating system 4.0 (Ice Cream Sandwich), or more recent. If your device is running an older operating system, see if you can update it to the current version. Click here for more about updating your operating system.
If you would like to see what operating system your device is currently running, open up your phone's Settings application and location the About or About Phone option. Find the section titled 'Version'.
Activate your SIM card.
Visit https://ott.freedompop.com/activate. Make sure your phone has been activated properly by entering your device's MEID number.
If your device was not fully activated, you will be asked to select a plan and put your credit card information on file. Complete these steps to activate your FreedomPop phone.
If your device was properly activated, you will get an error that tells you that your device has already been activated.
Need help finding your serial number? Click here.
Configure APN network settings
Step 1: Open your Settings app and tap on Mobile Networks. Different phones have a different path. Some phones may require tapping "More" first, or "Connections".
If your phone doesn't match what you see here, do a Google search for your device name and the phrase "APN steps" for help finding your phone’s APN settings. For example, if you have a Pixel phone, search the phrase "Pixel APN steps".
Step 2: Tap on the Access Point Names option. This is how your FreedomPop phone will connect to the mobile network.
If you cannot tap on Access Point Names, this probably means your device is locked to a specific carrier. Remember, only unlocked phones work with our SIM cards.
Step 3: Tap the "+" symbol to add a custom APN. On some phones you may see ADD instead of a "+" symbol.
Again, if you cannot add a new custom APN, your phone is probably locked to a carrier. Click here to learn more.
Step 4: Under APN, type in "fp.com.attz". Under NAME enter "FreedomPop" . Leave the other sections blank.
Step 5: Tap on Save and then go back to the previous menu. Tap on the newly added FreedomPop APN, to select it.
Install / Update the FreedomPop Messaging application
Visit the app store on your phone (tap the application called Play Store) and use the search bar to search for "FreedomPop Messaging". If you have not already downloaded this application, tap on INSTALL and wait for the application to download. This app is required for calling and texting to work.
IMPORTANT!
There are two FreedomPop applications in the store. One is called FreedomPop Messaging Phone/SIM and the other is called Text Free & Call Free.
Make sure that you ONLY download the FreedomPop Messaging Phone/SIM card application.
If you have downloaded the other application, uninstall it first, and then install the correct one.
If you have already downloaded the FreedomPop application, but need to update it to the latest version, tap the UPDATE button and wait for the update to download.
If you have already downloaded the FreedomPop Messaging application and you have the most up to date version of the application, you will simply see OPEN.
Make sure the application has the permissions it needs.
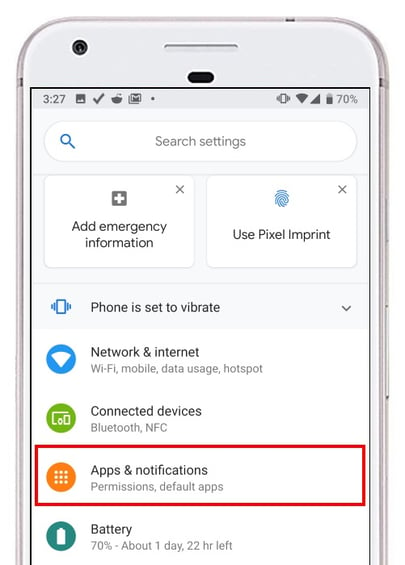
Step 1: Tap on your phone's Settings application.
Step 2: Tap on Applications or Apps.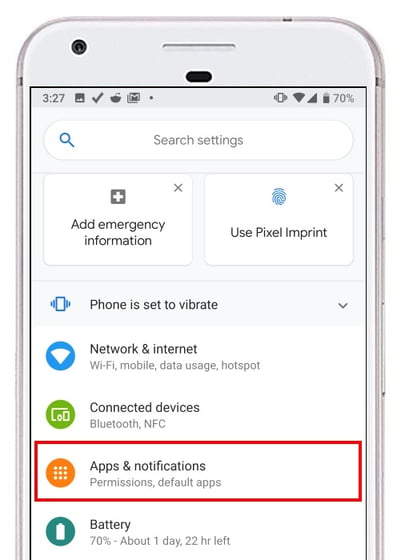
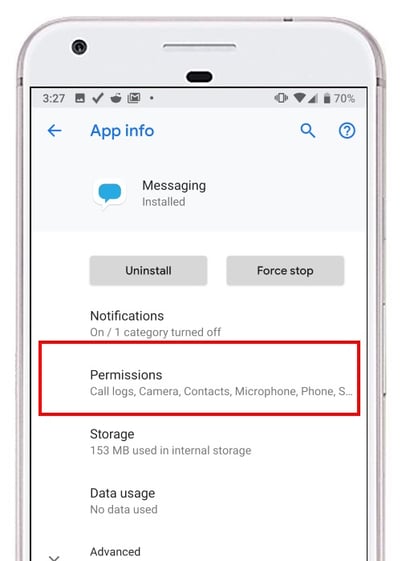
Step 3: Locate the FreedomPop Messaging application.

Step 4: Tap on Permissions.
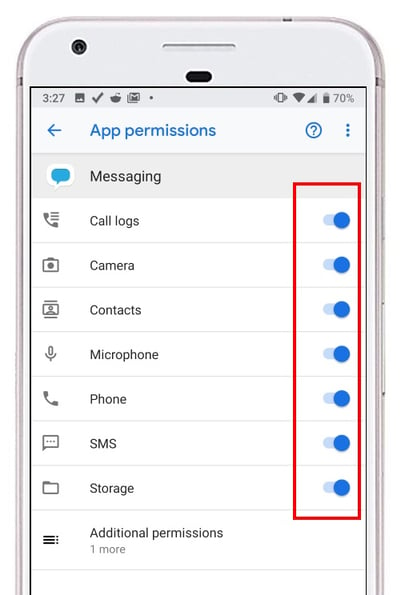
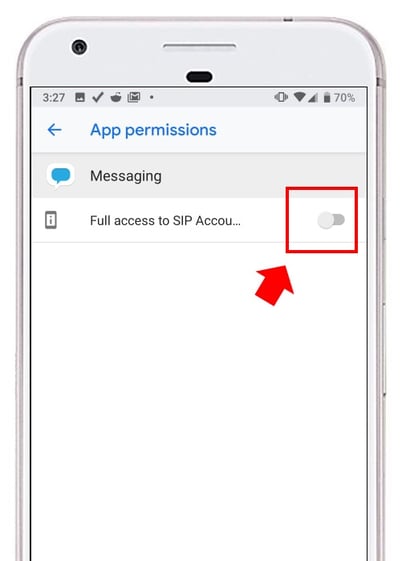
Step 5: Make sure all permissions are enabled. Use the toggle button to turn each permission request to ON.
Step 6: Tap on 'Additional Permissions'.
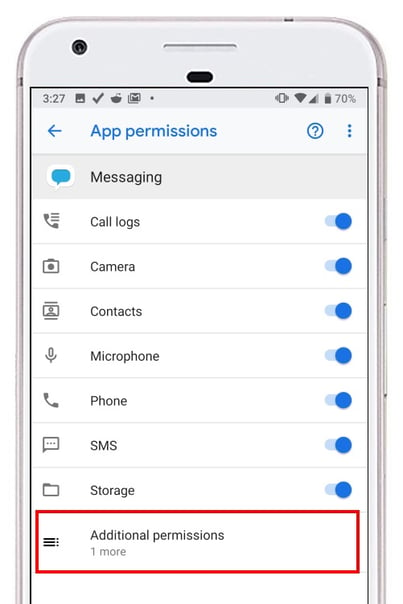
Step 7: Enable the last permission.
Sync Account Data
Step 1: Reboot the phone (turn it off and then on again).
Step 2: Go to the FreedomPop Messaging app.
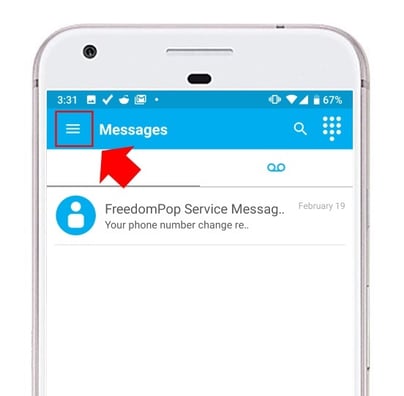
Step 3: Go to the Messaging Application's Settings by clicking on the 3 lines in the top left corner of the application.
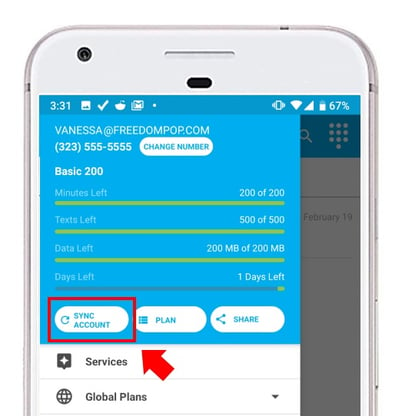
Step 4: Tap Sync Account Data to have the application refresh.
You can now use your phone and connect to the internet.
Still having problems? Reset the app
Please Note! This can remove call history and old text messages, so only use this step as a last resort.
Step 1: First tap on Settings.
Step 2: Then tap on Apps or Application Manager option.
Step 3: Find the FreedomPop Messaging application from the list of apps and then tap on it.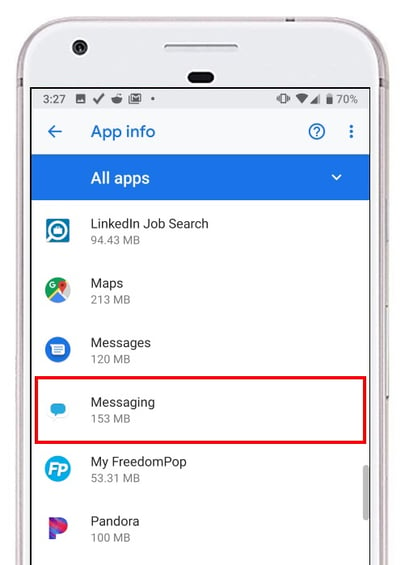
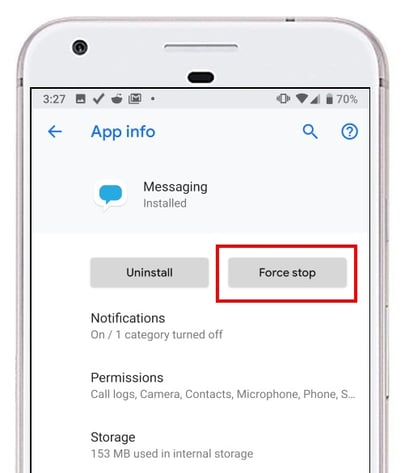
Step 4: Tap on Force Stop and tap YES or OK when prompted.
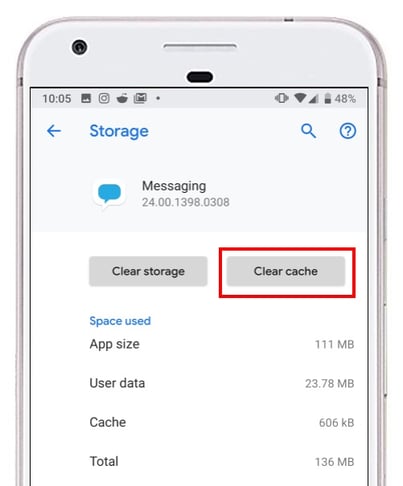
Step 5: Then tap Clear Data and tap YES or OK when prompted.
Don't see Clear Data? Tap on Storage, then select Clear App Data.
You can now use your phone and connect to the internet.